Adding a personal touch to your home doesn’t have to be expensive or complicated. With a little creativity and effort, DIY home decor projects can transform your space, making it feel more unique and inviting. Whether you love crafting, upcycling, or working with wood, these seven DIY projects will help you add personality to your home.
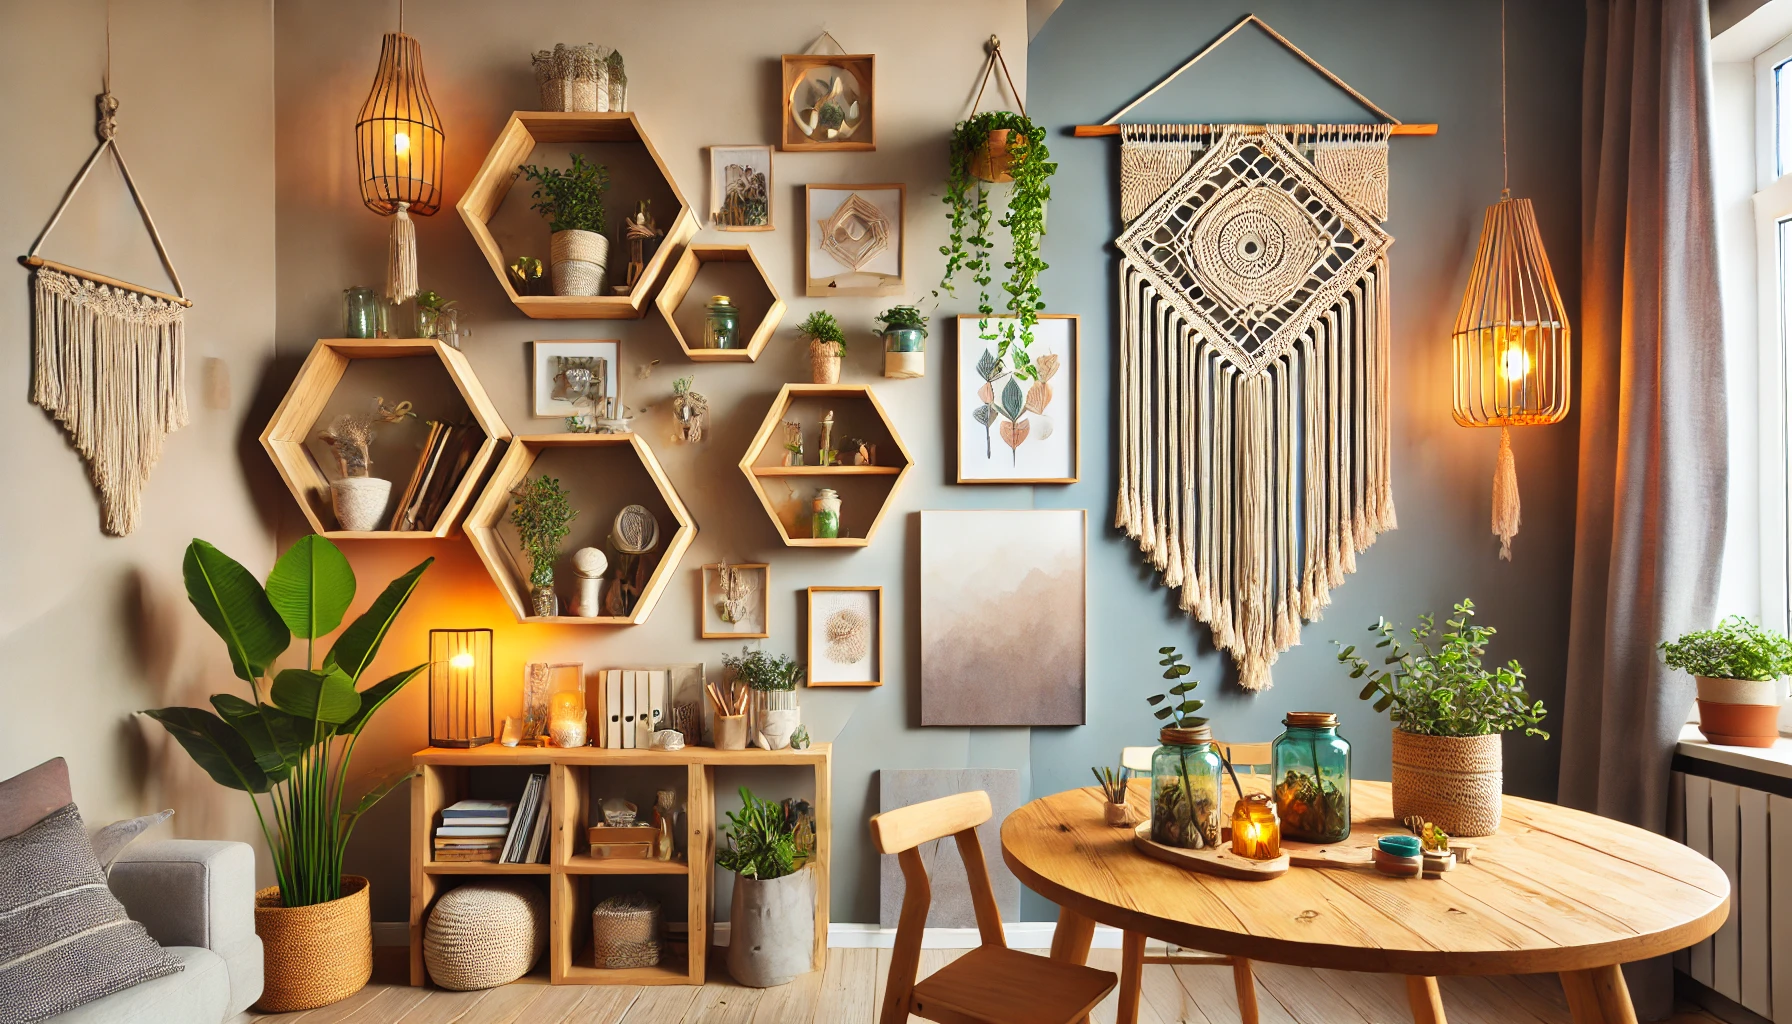
1. Handmade Macramé Wall Hanging
Macramé is a beautiful way to add texture and a boho-chic vibe to your space. This easy-to-make wall hanging can be customized with different knotting patterns and colors.
Materials Needed:
- Cotton rope or macramé cord
- Wooden dowel or driftwood
- Scissors
- Measuring tape
How to Make It:
- Cut the macramé cord into equal-length pieces.
- Attach the cords to the wooden dowel using a simple loop knot.
- Use basic macramé knots like the square knot and half hitch to create a pattern.
- Trim the bottom of the design to your desired shape.
- Hang it on a wall using a nail or hook.
💡 Tip: Experiment with dip-dyeing the bottom of the cords for a gradient effect.
2. DIY Floating Shelves
Floating shelves are a stylish and practical way to display decor, books, or plants without taking up floor space.
Materials Needed:
- Wooden boards (cut to size)
- L-brackets
- Screws and wall anchors
- Drill
- Sandpaper
- Wood stain or paint
How to Make It:
- Sand and stain or paint the wooden boards.
- Attach L-brackets to the wall using screws and wall anchors.
- Place the wooden boards on top of the brackets and secure them.
- Decorate with books, framed photos, or plants.
💡 Tip: Use reclaimed wood for a rustic look or paint the shelves in a bold color to make them pop.
3. Customized Picture Frame Collage
A picture frame collage is a perfect way to display memories, artwork, or inspirational quotes.
Materials Needed:
- Assorted picture frames
- Printed photos or artwork
- Adhesive strips or nails
- Measuring tape
How to Make It:
- Arrange the frames on the floor to find a balanced composition.
- Mark the placement on the wall using a measuring tape and pencil.
- Hang the frames using adhesive strips or nails.
- Swap out photos and artwork as needed to refresh the look.
💡 Tip: Mix different frame sizes and styles for an eclectic feel.
4. Painted Accent Wall or DIY Wallpaper
A bold accent wall can completely transform a room, and you don’t need professional wallpaper to achieve the look.
Materials Needed:
- Painter’s tape
- Paint in two or more colors
- Paintbrush or roller
- Stencils (optional)
How to Make It:
- Use painter’s tape to create geometric shapes or stripes on the wall.
- Paint within the taped areas and let it dry.
- Carefully remove the tape to reveal clean lines.
- If using stencils, apply paint with a sponge for an even effect.
💡 Tip: Try using a sponge to create a faux brick or textured effect.
5. Upcycled Glass Jar Lanterns
Glass jar lanterns add a cozy, rustic ambiance to any space, perfect for indoor or outdoor decor.
Materials Needed:
- Empty glass jars
- Twine or wire
- LED fairy lights or tealight candles
- Decorative pebbles or sand (optional)
How to Make It:
- Wrap twine or wire around the top of the jar to create a handle.
- Place LED fairy lights or a tealight candle inside the jar.
- Fill the bottom with decorative pebbles or sand for added texture.
- Hang them on hooks or place them on tables.
💡 Tip: Use tinted jars or paint them with frosted glass spray for a unique look.
6. DIY Wooden Headboard
A handmade wooden headboard adds warmth and character to your bedroom.
Materials Needed:
- Wooden planks
- Sandpaper
- Wood stain or paint
- Nails or screws
- Drill
How to Make It:
- Sand the wooden planks for a smooth finish.
- Stain or paint them in your desired color.
- Attach the planks together using nails or screws.
- Mount the headboard to the wall or secure it to the bed frame.
💡 Tip: Add LED strip lights behind the headboard for a soft glow.
7. Hand-Painted Flower Pots
Give plain plant pots a creative makeover with hand-painted designs.
Materials Needed:
- Terra cotta pots
- Acrylic paint
- Paintbrushes
- Sealer spray
How to Make It:
- Clean and dry the terra cotta pots.
- Use acrylic paint to create patterns, abstract designs, or floral motifs.
- Let the paint dry completely, then seal with a clear spray.
- Place your favorite plants inside and display them on a windowsill or shelf.
💡 Tip: Use stencils or painter’s tape for more precise patterns.
Final Thoughts
DIY projects allow you to express your creativity while making your home feel more personal and stylish. Whether you’re crafting a macramé wall hanging, building floating shelves, or painting plant pots, these projects are easy to customize to fit your aesthetic.
Try one or more of these DIY home decor ideas and enjoy the satisfaction of creating something unique for your space!